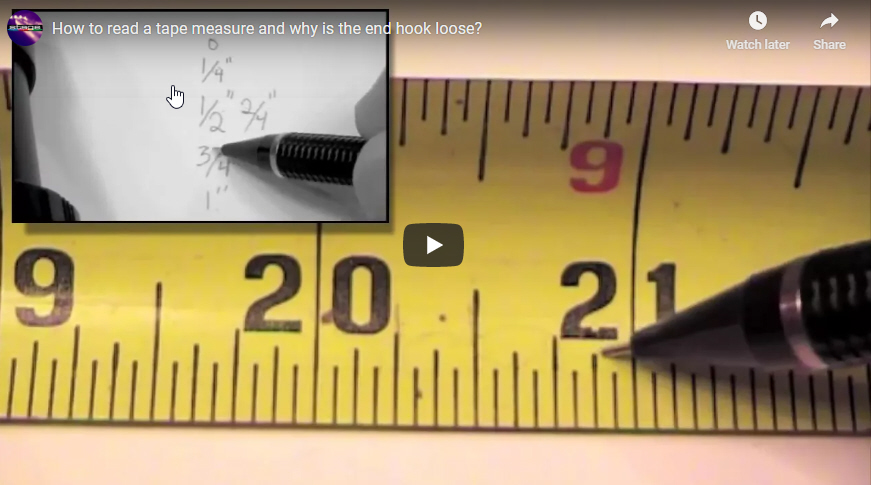
Learning how to properly use a tape measure is the basis for just about everything involved with laying out a stage, scenery, lighting, etc. This video shows how to use a standard 25′ tape measure.
[00:00:01.890]
Here we have a standard twenty five foot tape measure. At the end of the tape measure, we have a little hook. As we extend the tape out of the tape measure, we see that we have standard numbers starting at the end would be zero and we have one inch, two inches, three inches and so on when we extend out up to a foot, 12 inches. We see that we have a second set of numbers show up. We have 12 inches, which is also a foot, and we have 13 inches.
[00:00:43.680]
And then we also have a one inch. So 12 inches, 13 inches or one foot, one inch, that continues on to be one foot, two inches or 14 inches. Depends on what nomenclature you’re going to be using, feet and inches or just inches. The entire tape measure continues, as we’ll see when we get to two feet. We have two feet or twenty four inches two feet, one inch and so on. So we can find these measurements quickly.
[00:01:23.190]
Now, what I like to do is let’s cover what’s in between these full inch marks to make it easy. I’m going to go up to 20 inches so that we’re dealing with a zero and a one inch. So zero inches and one inch in between the zero and the one. We have several divisions. The largest of them is to divide it in half between zero and 1″. We have two halves. So it’d be 1/2″ and then a whole.
[00:01:56.580]
And it’s divided into two segments. And we’re getting into fractions here, which is a whole another area that we’re going to explore. Tape measures are a wonderful tool to learn fractions. So from zero 1/2″ to one, we’re dividing into two, which ends up being 1 slash 2. Half an inch. If we divided into fourths or four divisions, let’s say we divide this in half, so this is two divisions. This is our quarter line right there.
[00:02:41.590]
We have half and half of that, again, is a quarter. We’re going to add one quarter of an inch. And there are four quarters to the whole, just like there are four quarters to a dollar, we have zero 1/2″ full we have zero one quarter, two quarters, three quarters. And the whole is there, four quarters here is one quarter is another quarter and another quarter. And now that we have our one quarter from zero to one quarter, if we cut this in half, this is an eighth line.
[00:03:25.840]
This is one eighth. There are eight segments this size within our inch, one eighth, two eighths, which is also quarter three eighths four eighths which is a 1/2″ five eighths, six eighths, which is three quarters, seven eighths and then eight eighths. Since the 1″ inch divided into eight sections, one, two, three, four, five, six, seven, eight. Getting to the smallest mark on our inch is a sixteenth. Between the eighth and zero is one sixteenth and there are sixteen separate lines.
[00:04:12.310]
One, two, three, four, five, six, seven, eight, nine, ten, eleven, twelve, thirteen, fourteen, fifteen, sixteen. So each one of these lines, each one of these spaces is a sixteenth of an inch, at the shortest line. You’ll notice that the largest line is half an inch then a quarter then an eights, then a sixteenth. You might be asking why we don’t do this at the zero at the very end of the tape measure,
[00:04:55.280]
We can run into some inaccuracies, as you can see, this one has a little bit of wear and tear, and when you’re using a tape measure at the very end, we have our one inch then go backwards to half an inch and we have a zero. But looking at this device here, you’ll see that it moves and it could be considered loose. It’s actually designed to do this. The reason why it’s designed to do that is that when you’re measuring an object that you push the tape measure up against, we want this to extend in.
[00:05:35.720]
When you’re measuring an object that you’d like to hook off the end, let’s say the length of a piece of wood you go over and you’ll see that the end moves. So we’re pushing in the end moves in, and if you’re pulling on the end of a piece of wood, it pulls out. The reason why you want this to happen is to account for the thickness of this piece of metal itself. If you think about it, if it didn’t move, then if we measure it on the inside, it might be accurate.
[00:06:10.220]
But if we then measure on the outside and we’re not to move, it would not be accurate because of this thickness of this piece of metal. So we actually want this to move ever so slightly.
