

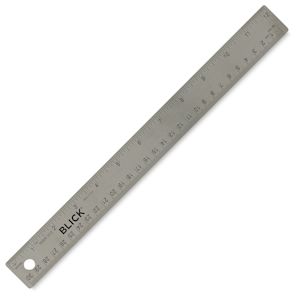
Learning how to properly use a ruler is the basis for just about everything involved with laying out a stage, scenery, lighting, etc. This video shows how to use a standard 12 inch ruler upon a full-scale ruler worksheet.
Using an Imperial Ruler: Teacher Handout
Focus: Reading inches, halves, quarters, eighths, sixteenths, and thirty‑seconds on a standard 12″ ruler.
Materials
-
Full‑size imperial ruler worksheet (lines and a sample box)
-
Standard 12″ imperial ruler
-
Pencil and eraser
1. Introduce the Ruler
Explain that you’re working with a standard 12″ ruler marked in inches and fractions of an inch. Point out:
-
Whole‑inch marks (numbered 0, 1, 2, 3, etc.)
-
Smaller tick marks between inches that represent fractional parts of an inch
Show the worksheet and note that the first line is already labeled as an example.
2. Whole Inches and the First Example (5 1/2″)
Have students look at the first example line on the worksheet.
-
Place the “0” of the ruler at the left end of the line.
-
Read the length out to the right:
-
The line passes the 5″ mark.
-
Between the 5″ and 6″ marks, the longest middle tick mark is the 1/2″ mark.
-
-
So the line length is 5 1/2 inches.
-
Have students write:
5 1/2"next to the line.
Use this to review:
-
Inches are broken into smaller equal parts.
-
The longest tick between inches is the half‑inch.
3. Halves, Quarters, Eighths, Sixteenths
Work across one inch of the ruler and identify:
-
Halves: 2 parts per inch
-
1/2, 2/2 (which is the next whole inch)
-
-
Quarters: 4 parts per inch
-
1/4, 2/4 (same as 1/2), 3/4, 4/4 (whole inch)
-
-
Eighths: 8 parts per inch
-
1/8, 2/8 (1/4), 3/8, 4/8 (1/2), 5/8, 6/8 (3/4), 7/8, 8/8 (whole inch)
-
-
Sixteenths: 16 parts per inch
-
1/16, 2/16 (1/8), 3/16, 4/16 (1/4), 5/16, 6/16 (3/8), 7/16, 8/16 (1/2), 9/16, 10/16 (5/8), 11/16, 12/16 (3/4), 13/16, 14/16 (7/8), 15/16, 16/16 (whole inch)
-
Emphasize that:
-
Longer lines usually represent larger fractions (1/2, 1/4, 1/8).
-
The shortest lines are the sixteenths.
4. Measuring the Second Line (3 3/4″)
Move to the next, unlabeled line on the worksheet.
-
Place zero at the left end of the line.
-
Count: 0, 1, 2, 3… then continue into the space between 3″ and 4″.
-
Find the quarter‑inch ticks:
-
The half‑inch is the longest middle mark.
-
The quarter marks are the next‑longest.
-
-
The line lands on the third quarter tick after 3″, which is 3/4″ past 3″.
-
Write the dimension as:
3 3/4".
If you like, model adding short “witness” lines and a dimension line (from your drafting practice), but you can decide how formal you want to be on this worksheet.
5. Another Line: 2 5/8″
Pick a different line on the worksheet.
-
Start at zero and read:
-
Past 1″, past 2″.
-
-
Between 2″ and 3″:
-
Identify 2 1/4″, then 2 1/2″.
-
The next slightly longer mark after 2 1/2″ is 1/8″ more, so that’s 2 5/8″.
-
-
Have students write:
2 5/8".
Use this example to remind them:
-
Four eighths make a half, so 1/2″ = 4/8″.
-
Fractions add up: 1/2 + 1/8 = 5/8.
6. Measuring the Box with 32nds
Now move to the small box on the worksheet and measure one side that is just slightly longer than a simple sixteenth or eighth mark.
-
First, measure roughly:
-
From 0 to 1″ is the whole inch.
-
The side is a bit longer than 1″.
-
-
On some detailed rulers, the smallest marks are 1/32″.
-
To measure precisely:
-
Line up the zero on one end.
-
Count the tiny 1/32″ lines beyond 1″.
-
For example, if you count 15 tiny marks beyond 1″, that would be 1 15/32″.
-
-
Have students write:
1 15/32"(or whatever the specific value is on your printed worksheet).
Point out that:
-
32nds are very small and not all rulers go that fine.
-
This is more advanced, but it shows how precise measurements can get.
7. Wrap‑Up and Suggestions
Encourage students to:
-
Always start at the “0” mark, not at the physical end of the ruler.
-
Identify the largest fraction marks first (1/2, 1/4, 1/8), then work down to the smaller ones.
-
Say the measurement out loud before writing it to reinforce the fraction.
If you want to extend the activity:
-
Have students draw their own lines and boxes, then trade papers and measure each other’s work.
-
Connect this directly to drafting, carpentry, scenic construction, or prop building so they understand why fractional accuracy matters.